Hi friends! First off—welcome to ArtWithMrsE.com! Wow, I can’t believe I’m saying that!
When I started documenting my adventures in art education on Instagram back in 2013, I never imagined it would open the door to such amazing opportunities to connect with fellow art teachers, parents, artists, and anyone who values creativity. I’m so excited to start this next chapter and share more in-depth lesson ideas, art teacher tips, and insights from my own creative journey.
If you’re a brand new art teacher, let me start by saying: CONGRATULATIONS! There’s nothing quite like stepping into your own classroom or teaching space for the first time. Whether you’re in a traditional art room, on a cart, or creating magic in a multipurpose space, it’s a huge milestone—and it can also feel completely overwhelming.
Fourteen years ago, I was in your shoes: excited, inspired, and also thinking… “Where do I even begin?” My classroom walls were bare, and students were showing up in just a few days. So if you're feeling that wave of excitement mixed with panic—I’ve got you.
Here are 8 essential tips to help you start the school year feeling organized, confident, and ready to thrive as an art teacher.
1. Give Yourself Grace
Yes, I said it—and now read it again. Give. Yourself. Grace. Whether you’re new to teaching, new to art education, or just starting a new school year feeling frazzled, you are not alone.
Even veteran teachers (myself included!) feel the chaos at the start of the year. If something’s not working, pivot. If something doesn’t feel true to who you are as a teacher, scrap it. Your students thrive when you’re energized and present—not perfect.
2. Start with your floor plan/classroom layout.

Before you move a single piece of furniture, sketch out your ideal classroom layout. Think through:
-
Where is your teaching/demo space?
-
How will students enter, move through, and exit the room?
-
Where will students store or dry artwork?
-
Will any students have their backs to you during instruction?
-
Are there any safety or accessibility concerns?
Once you have a vision, ask a custodian or colleague to help move tables or furniture into place. Planning flow now will save you so much time later.
3. Develop Your Classroom Management System

A solid classroom management plan is your secret weapon. Decide:
-
What are your expectations and rules?
-
Will you create them yourself or with students?
-
What are the consequences (positive and negative) for behavior?
Be clear, consistent, and visual. Kids thrive on knowing what’s expected. I personally love using “Art Stars”—a simple system where one student per class earns a sticker and becomes the next class’s helper. Cheap, cheerful, and super effective! Also, call me crazy but I also use face painting as incentive! You can actually read more about it on this blog here.
4. Student Artwork Organization
You’ll be managing hundreds (yes, hundreds!) of pieces of art. The key? Find a system that works for your space:
-
Got drawers? Use them! Assign one per class.
-
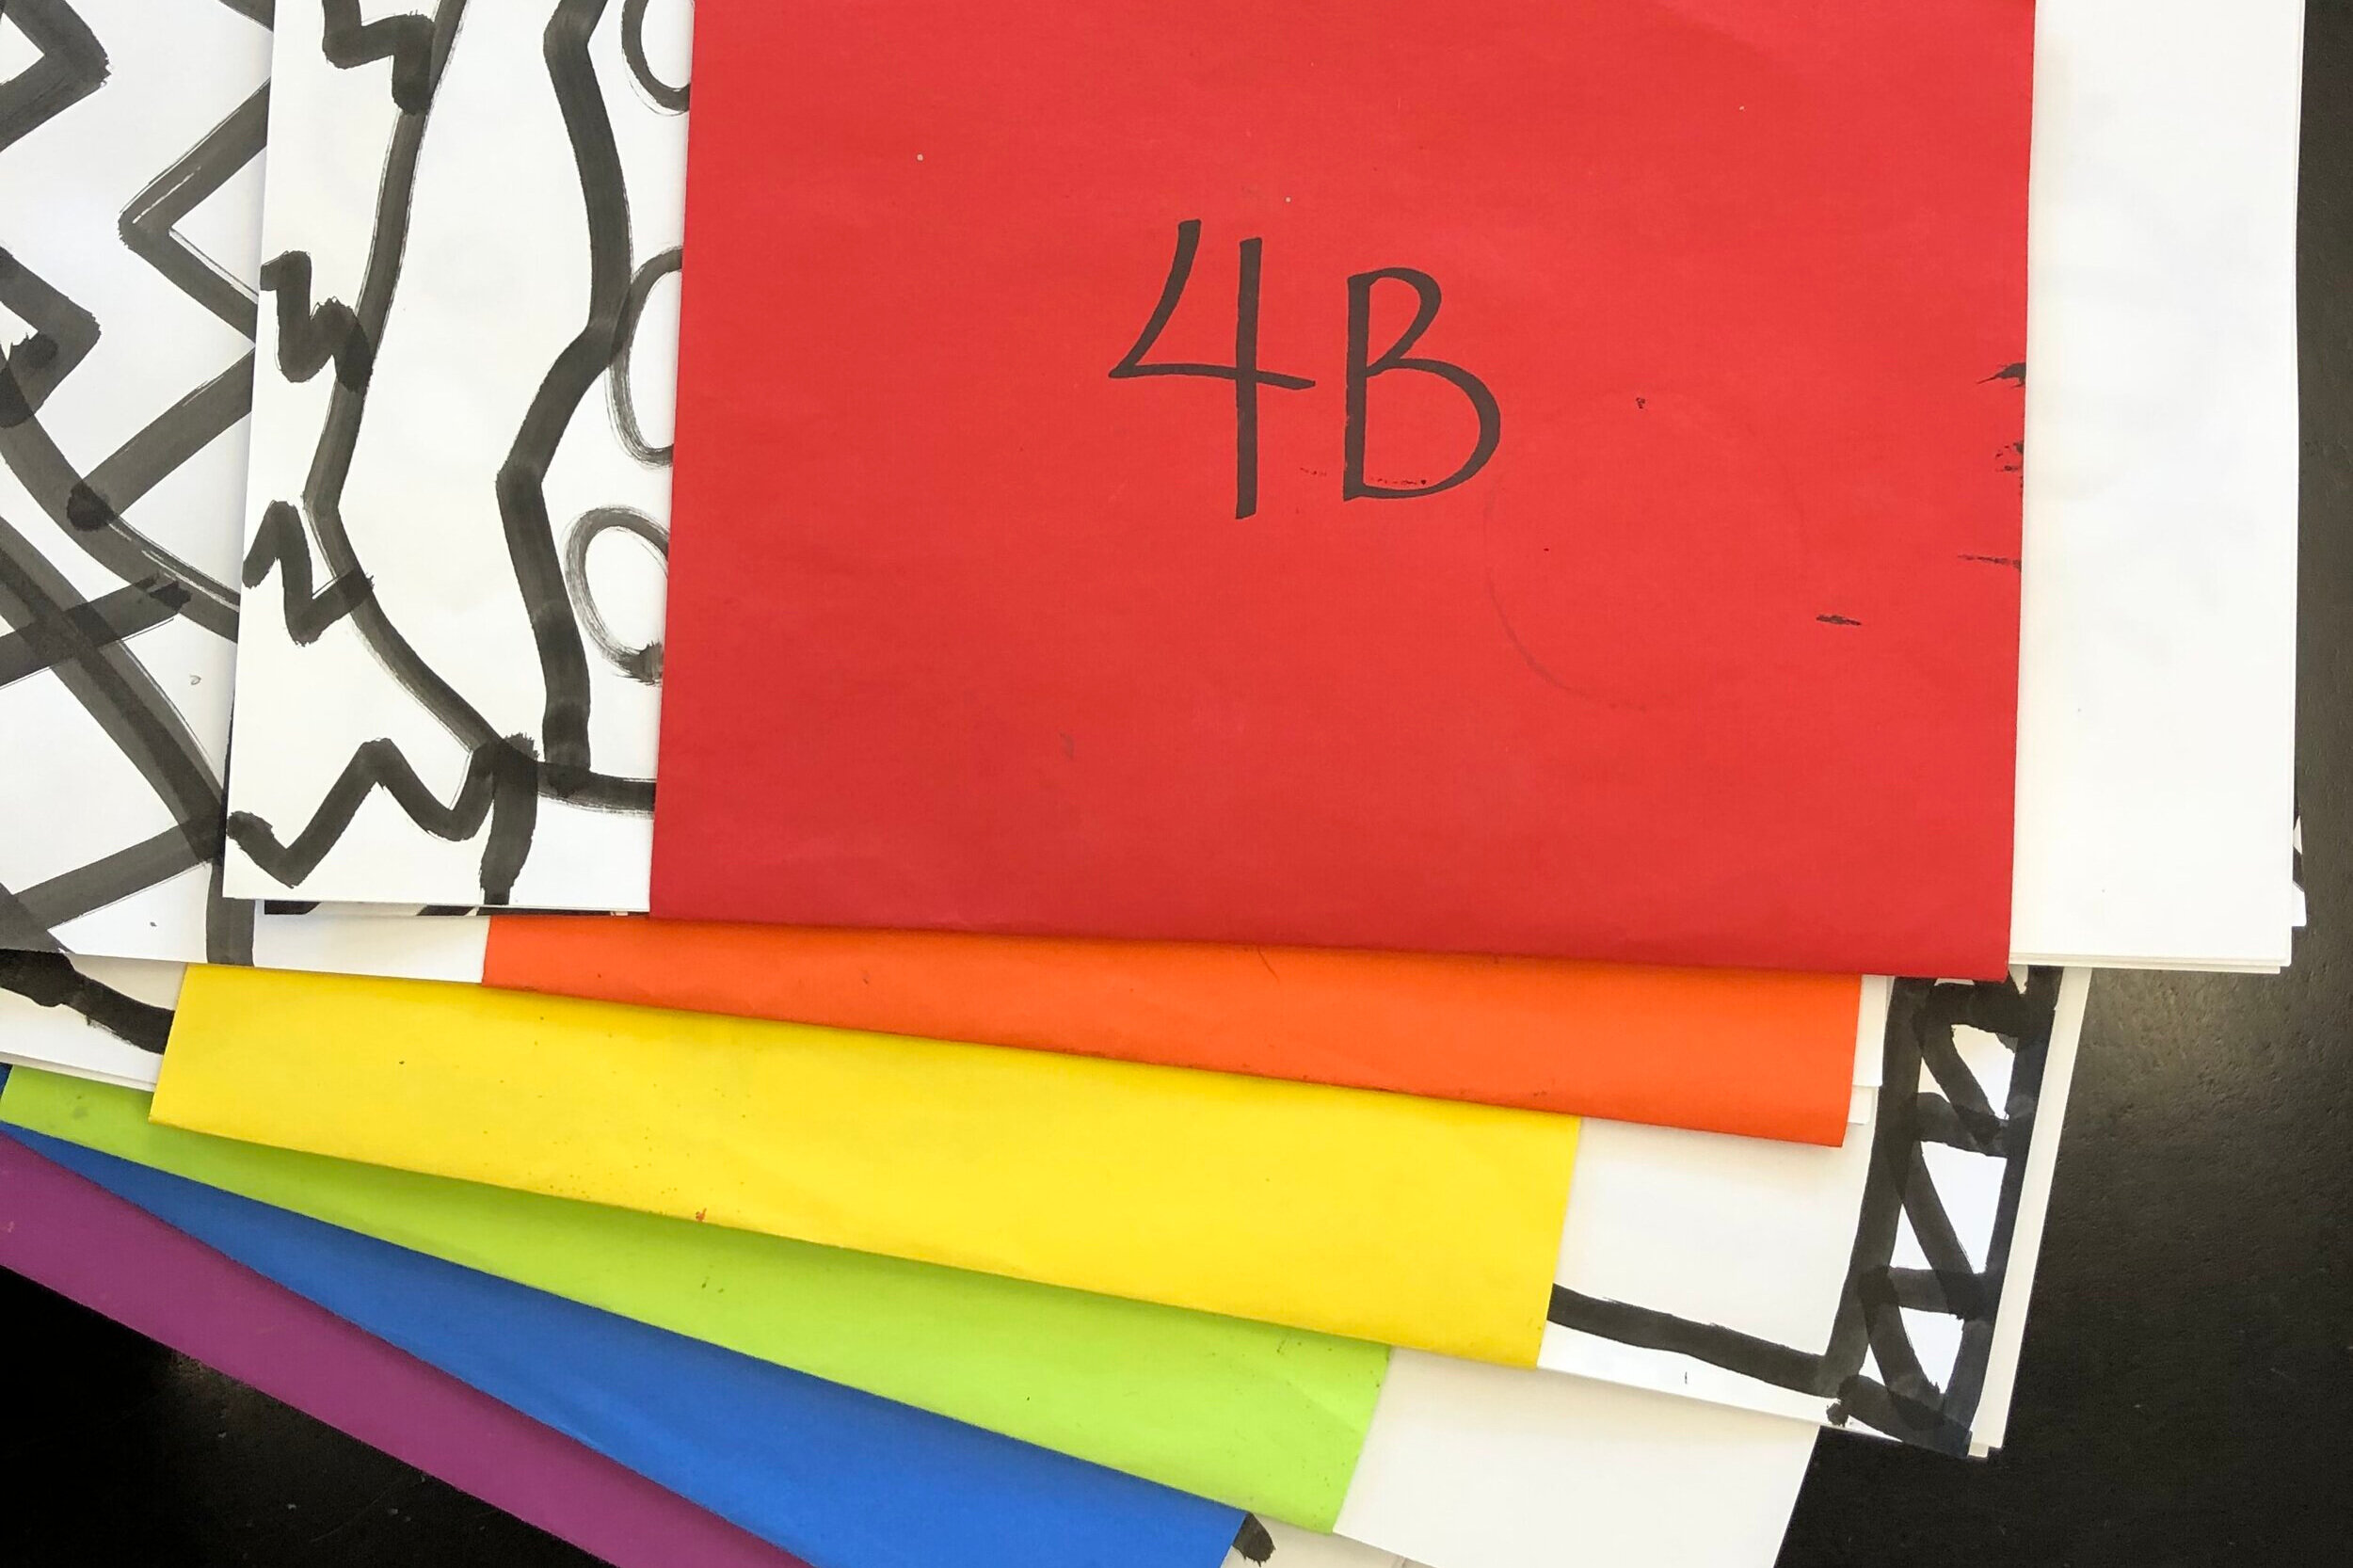
No drawers? No problem. Try large class folders made from two stapled poster boards.
-
Teaching on a cart? Store folders vertically in drying racks, cabinets, or even between furniture.
Pro tip: Create smaller “table folders” for each group (color-coded or numbered) and store them inside the class folders. Students clean up faster, and setup is a breeze next time.
5 . Art Material Storage and Organization.

Let’s face it—art teachers are the keepers of all the fun stuff! But supply organization can be a beast.
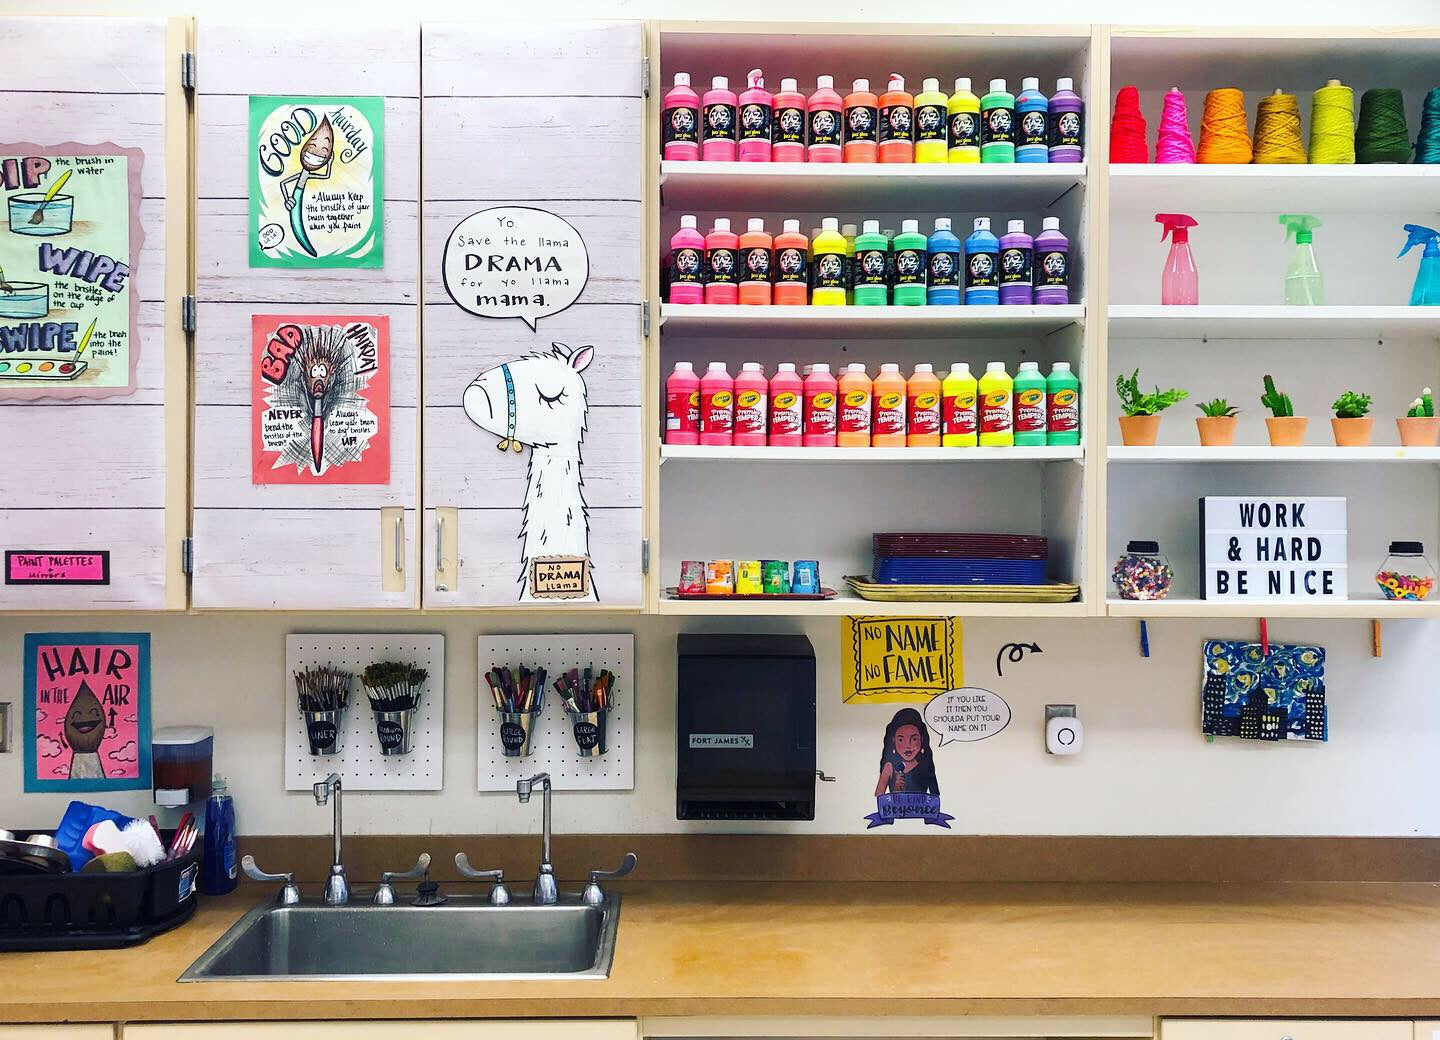
Start by taking inventory. Prioritize your most-used materials and store them where you can access them easily. For example, I keep:
-
My most-used materials (oil pastels, Sharpies, construction crayons) at eye level.
-
Rarely-used items on higher shelves.
-
Paints and clay supplies near my sink for easy prep.
Bonus tip: Display your supplies with intention! Think clear jars, rainbow order, and inviting setups. I took inspiration from Bar Rucci at ArtBarBlog and removed a few cabinet doors to display fluorescent paints and brushes in matching tins. Functional and beautiful.
Also—label everything! Visual labels (with images + words) help students, subs, aides, and ESL learners navigate the space with ease. You can grab my editable supply labels here if you need a jumpstart!
6. Create a Warm and Inviting Space.

You’ll spend a lot of time in this room—make it one you love walking into! Decorate in a way that reflects your personality and inspires your students. Whether that’s bright rainbows, cozy café lights, fun plants, or clean modern visuals, be true to you.
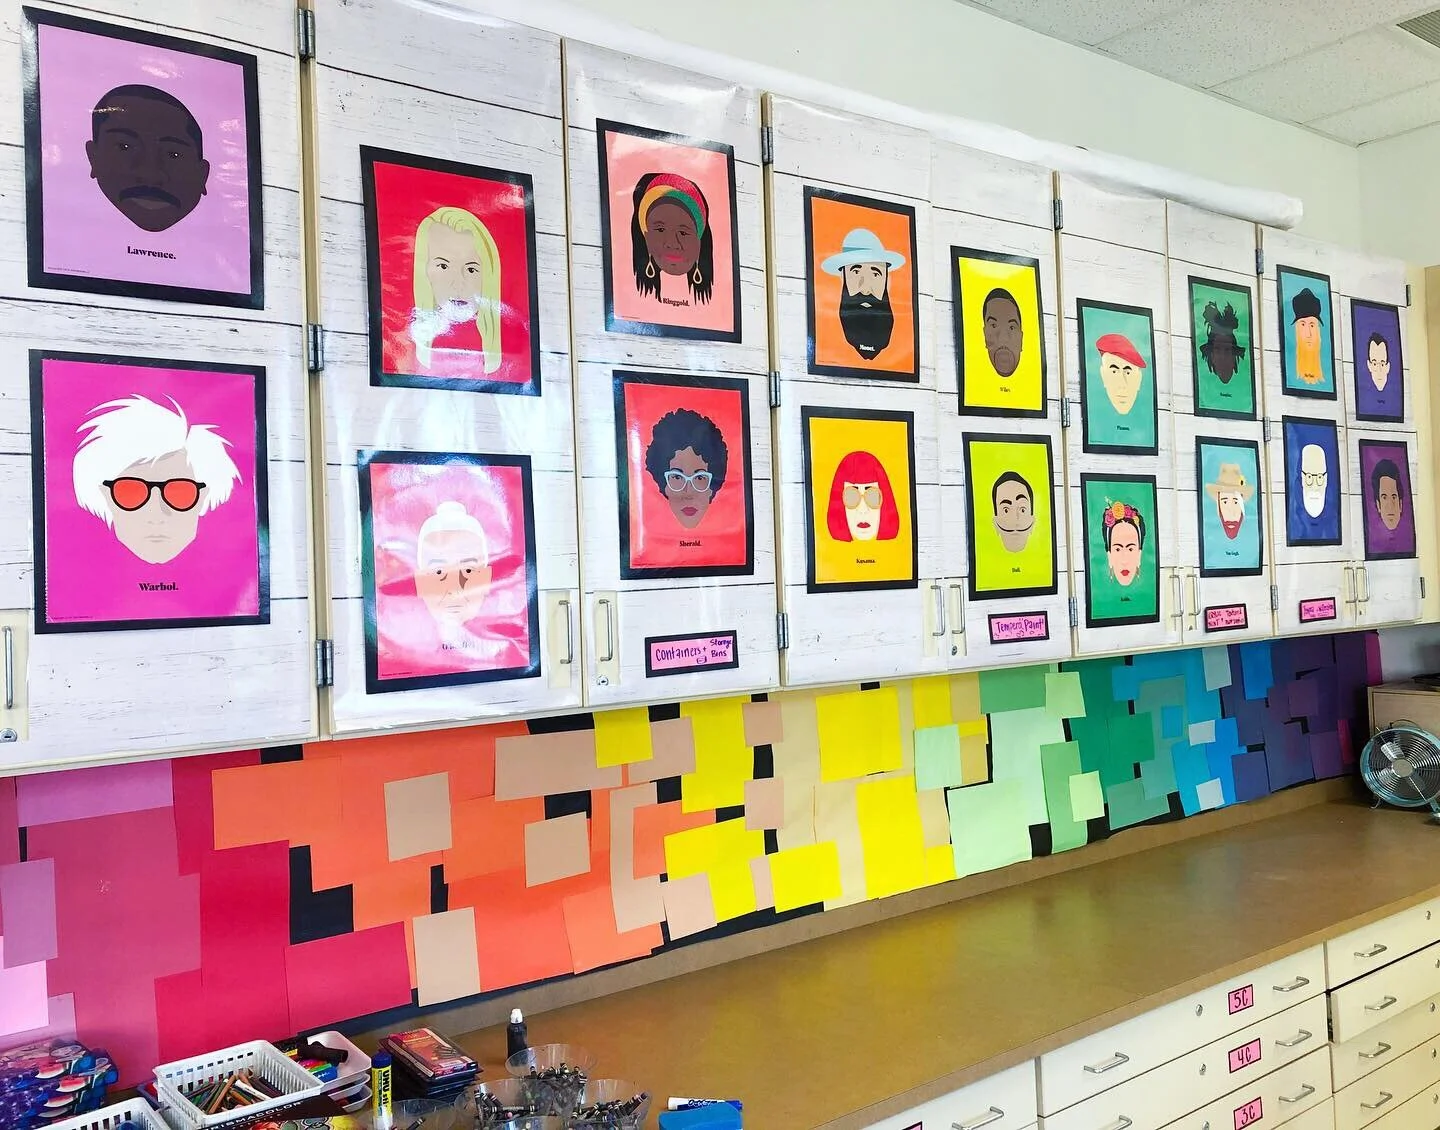
Don’t underestimate the power of a statement wall, a mural, or even a little tabletop fountain (my students once LOVED this in a mobile classroom!). I have been making bright and colorful classroom visuals by hand for MANY years, and have finally digitized most of my displays for others to use as well! If you're looking to brighten up your space but don't have a ton of time, check out my classroom decor (you'll find things like these Famous Artists Posters, Elements of Art + Design, No Drama Llama and so much more!
7. Share Bits of Your Personality
One way that I show some of my personality in my classroom is with one word: Personification. Seriously, I know it’s silly but there’s nothing kids love more than word bubbles and crazy googly eyes. Giving inanimate objects in your room a personality is a fun way to engage students and still share valuable information with them. There’s just something about an old paintbrush with crazy eyes on it that helps teach kids about the right way to care for a paintbrush.

If the silly route isn’t your thing, that’s ok! Just don’t be afraid to share bits of who you are either through your visuals, the style of your room, or even through displaying your own art! Show off your amazing artistic skills by displaying some of your own art so that students can also see you as a practicing artist!
8. Build Relationships First…

As Kayla Dornfeld says: “Relationships first. Everything else second.”
The first few weeks aren’t about jumping straight into curriculum. They’re about building trust and getting to know your students. I love starting the year with sketchbook covers that reflect students' passions. It gives me insight into their personalities, and we build rapport as I walk around and chat with students about their interests.
Sketchbooks are a safe space for practice, self-expression, and growth. They're also a powerful tool for assessment and connection. Want to learn more about how I use sketchbooks? I wrote several blogs about the topic. Here's how we make them at the start of the school year and why I believe they are so important!
Whether you’re brand new to art education or just need a fresh start this year, I hope this blog helps you feel seen, supported, and inspired. If you need anything, don't hesitate to reach out to me via email or IG (@artwithmrs.e)
You’ve got this! 💛
xo – Kaitlyn


5 comments
I absolutely love your “every child is an artist” wall. How did you do it? Where did you find the big sign/tapestry? I want it for my art room.
Hello!
I’m preparing my new small classroom.Could you please tell me more about “table folders”,if have photos was better for me to imagine them.
Thank you.
What is your advise on teaching kids "middle schoolers " that don’t want to do art.
Hello! Thank you for all the tips! Could you please tell me more about the sketchbooks? That is something I would like to do with my student’s but not sure how. How do you make them and what goes in them? Do you use them everytime? I teach K-8 but was going to use them for 5-8 or should I include the younger ones as well? Eee…I’m not really an art teacher who’s teaching art so I’m unsure….of a lot. Any insight would be much appreciated! Thank you!
:) Kris
Hi! I love your posts and your classroom! I am curious about how you covered your cabinet doors. What material did you use, and it is laminated? Is it better than paper?