Blog

10 Must-Have Books that Inspire Creativity!
If you've been following me for a while on Instagram, you know that I am a crazy Children's lit lover! How many pictures books do I have in my classroom AND in my own kids' rooms? The limit DOES NOT exist! Since recently celebrating Read Across America Week, I thought I would go ahead and share some of my favorite books to have in the art room- or in any space hoping to inspire children. Here we go! 1. The Art Lesson | Tommie DiPaola. Call it nostalgia, but this book has been one of my absolute favorites since my childhood. In fact, my aunt bought me this book when I was in kindergarten and addressed it to me, "The Real Artist" just like Tommie in the book. Cue the tears! This was the book that made me want to be an artist and ultimately an art teacher. Everyone needs a bit of Tomie dePaola magic in their classroom. You can buy it here. 2. Bridget's Beret | Tom Lichtenfeld This is such a sweet story about overcoming your obstacles and creative blocks and finding your creative spirit again! It also always helps when you read it WITH a beret to your students :) Grab it here! 3. Mixed: A Colorful Story | Arree Chung Such a cute book when teaching about color mixing, and a great moral to the story as well. An art room must have! Grab Mixed here! 4. Aaron Slater, Illustrator | Andrea Beaty Did this book make me cry the first time I read it? Yes. Do I see a bit of myself in the main character Aaron? Also Yes. Do I think our children need to read about a character who isneurodivergent? 100x yes. You can buy Aaron Slater here! 5. What do You Do with an Idea? | Kobi Yamada A beautiful story about staying true to yourself and your ideas no matter who supports you from the start. The illustrations are just breathtaking as well. Buy it here! 6. The Day the Crayon's Quit | Drew Daywalt A now "classic" in the classroom. A hilarious tale about crayons who have a real bone to pick with their owner and write him many letters to air their grievances. You can find it here! 7. Be a Maker | Katey Howes I absolutely LOVE the message of this book. Not only does the author encourage the readers to be a maker and explore their creativity- but she shows us how important it is to put your talents to use for the good of other! You can find Be a Maker here! 8. The Creatrilogy Series (The Dot, Ish, and Sky Color) | Peter H. Reynolds It wouldn't be an art room book list without The Dot and the rest of the Creatilogy trilogy would it? Peter Reyonlds' main character, Vashti, takes us along on her journey to find her creative spark to "just make a mark". Grab The Dot here! 9. Swatch, the Girl Who Loved Color | Julia Denos I feel as though Swatch, the main character in this book is an illustrated version of me. Swatch, the color tamer shares her love of color a little bit of chaos. The perfect book for a busy, colorful art room! Grab Swatch here! 10. Boxitects | Kim Smith This book is so inspiring, especially coming out of a 2 year pandemic where my kid and I heavily relied on creating things out of cardboard to save our sanity in quarantine! Not only is the story really sweet but there is also several "how-to's" in using cardboard to create all kinds of amazing creations! This one is my son's favorite on the list! You can grab Boxitects here. Whether you are just beginning to build your art room library or are looking for new books to add to your classics, I hope you were able to find this list helpful! Keep creating and keep reading!
Learn more
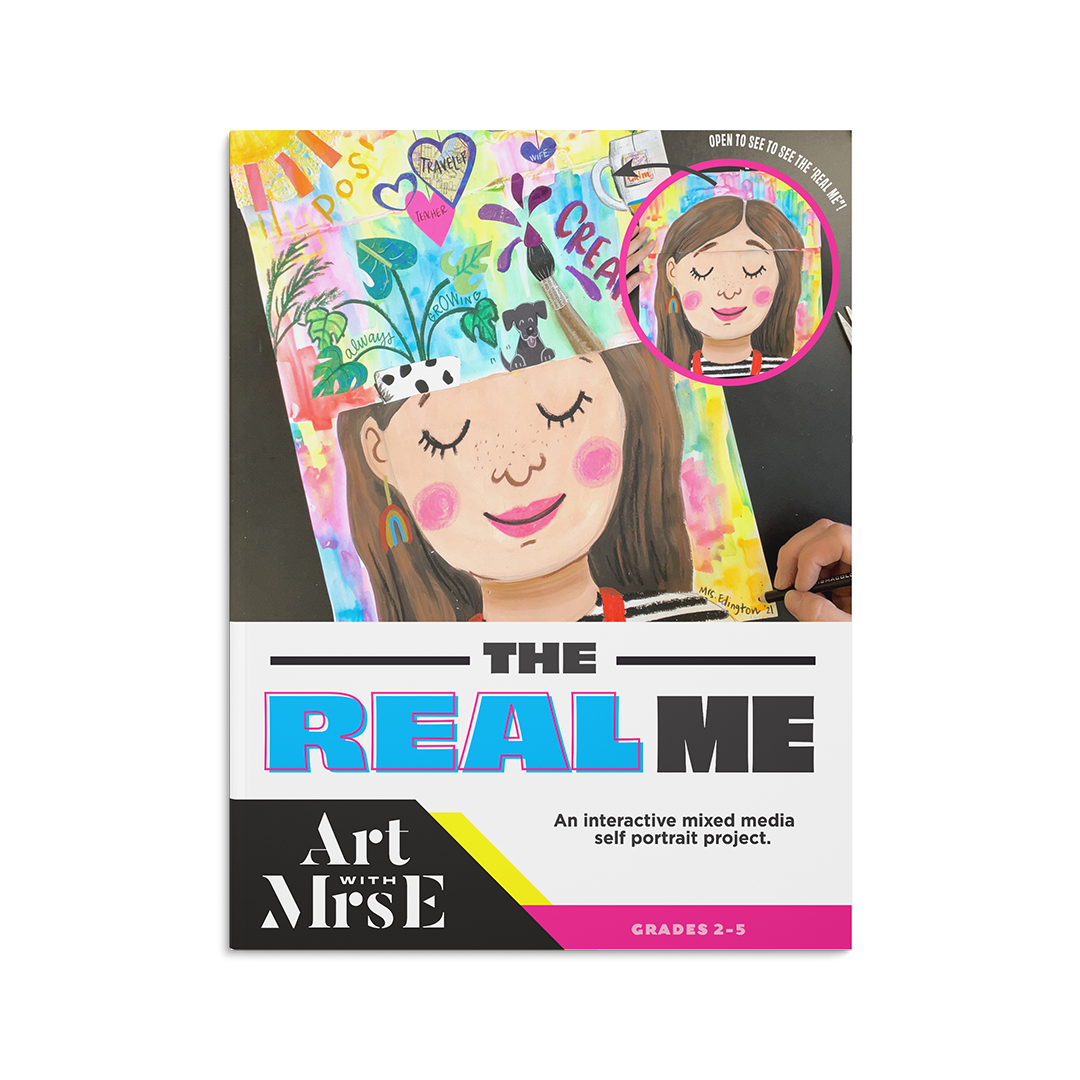
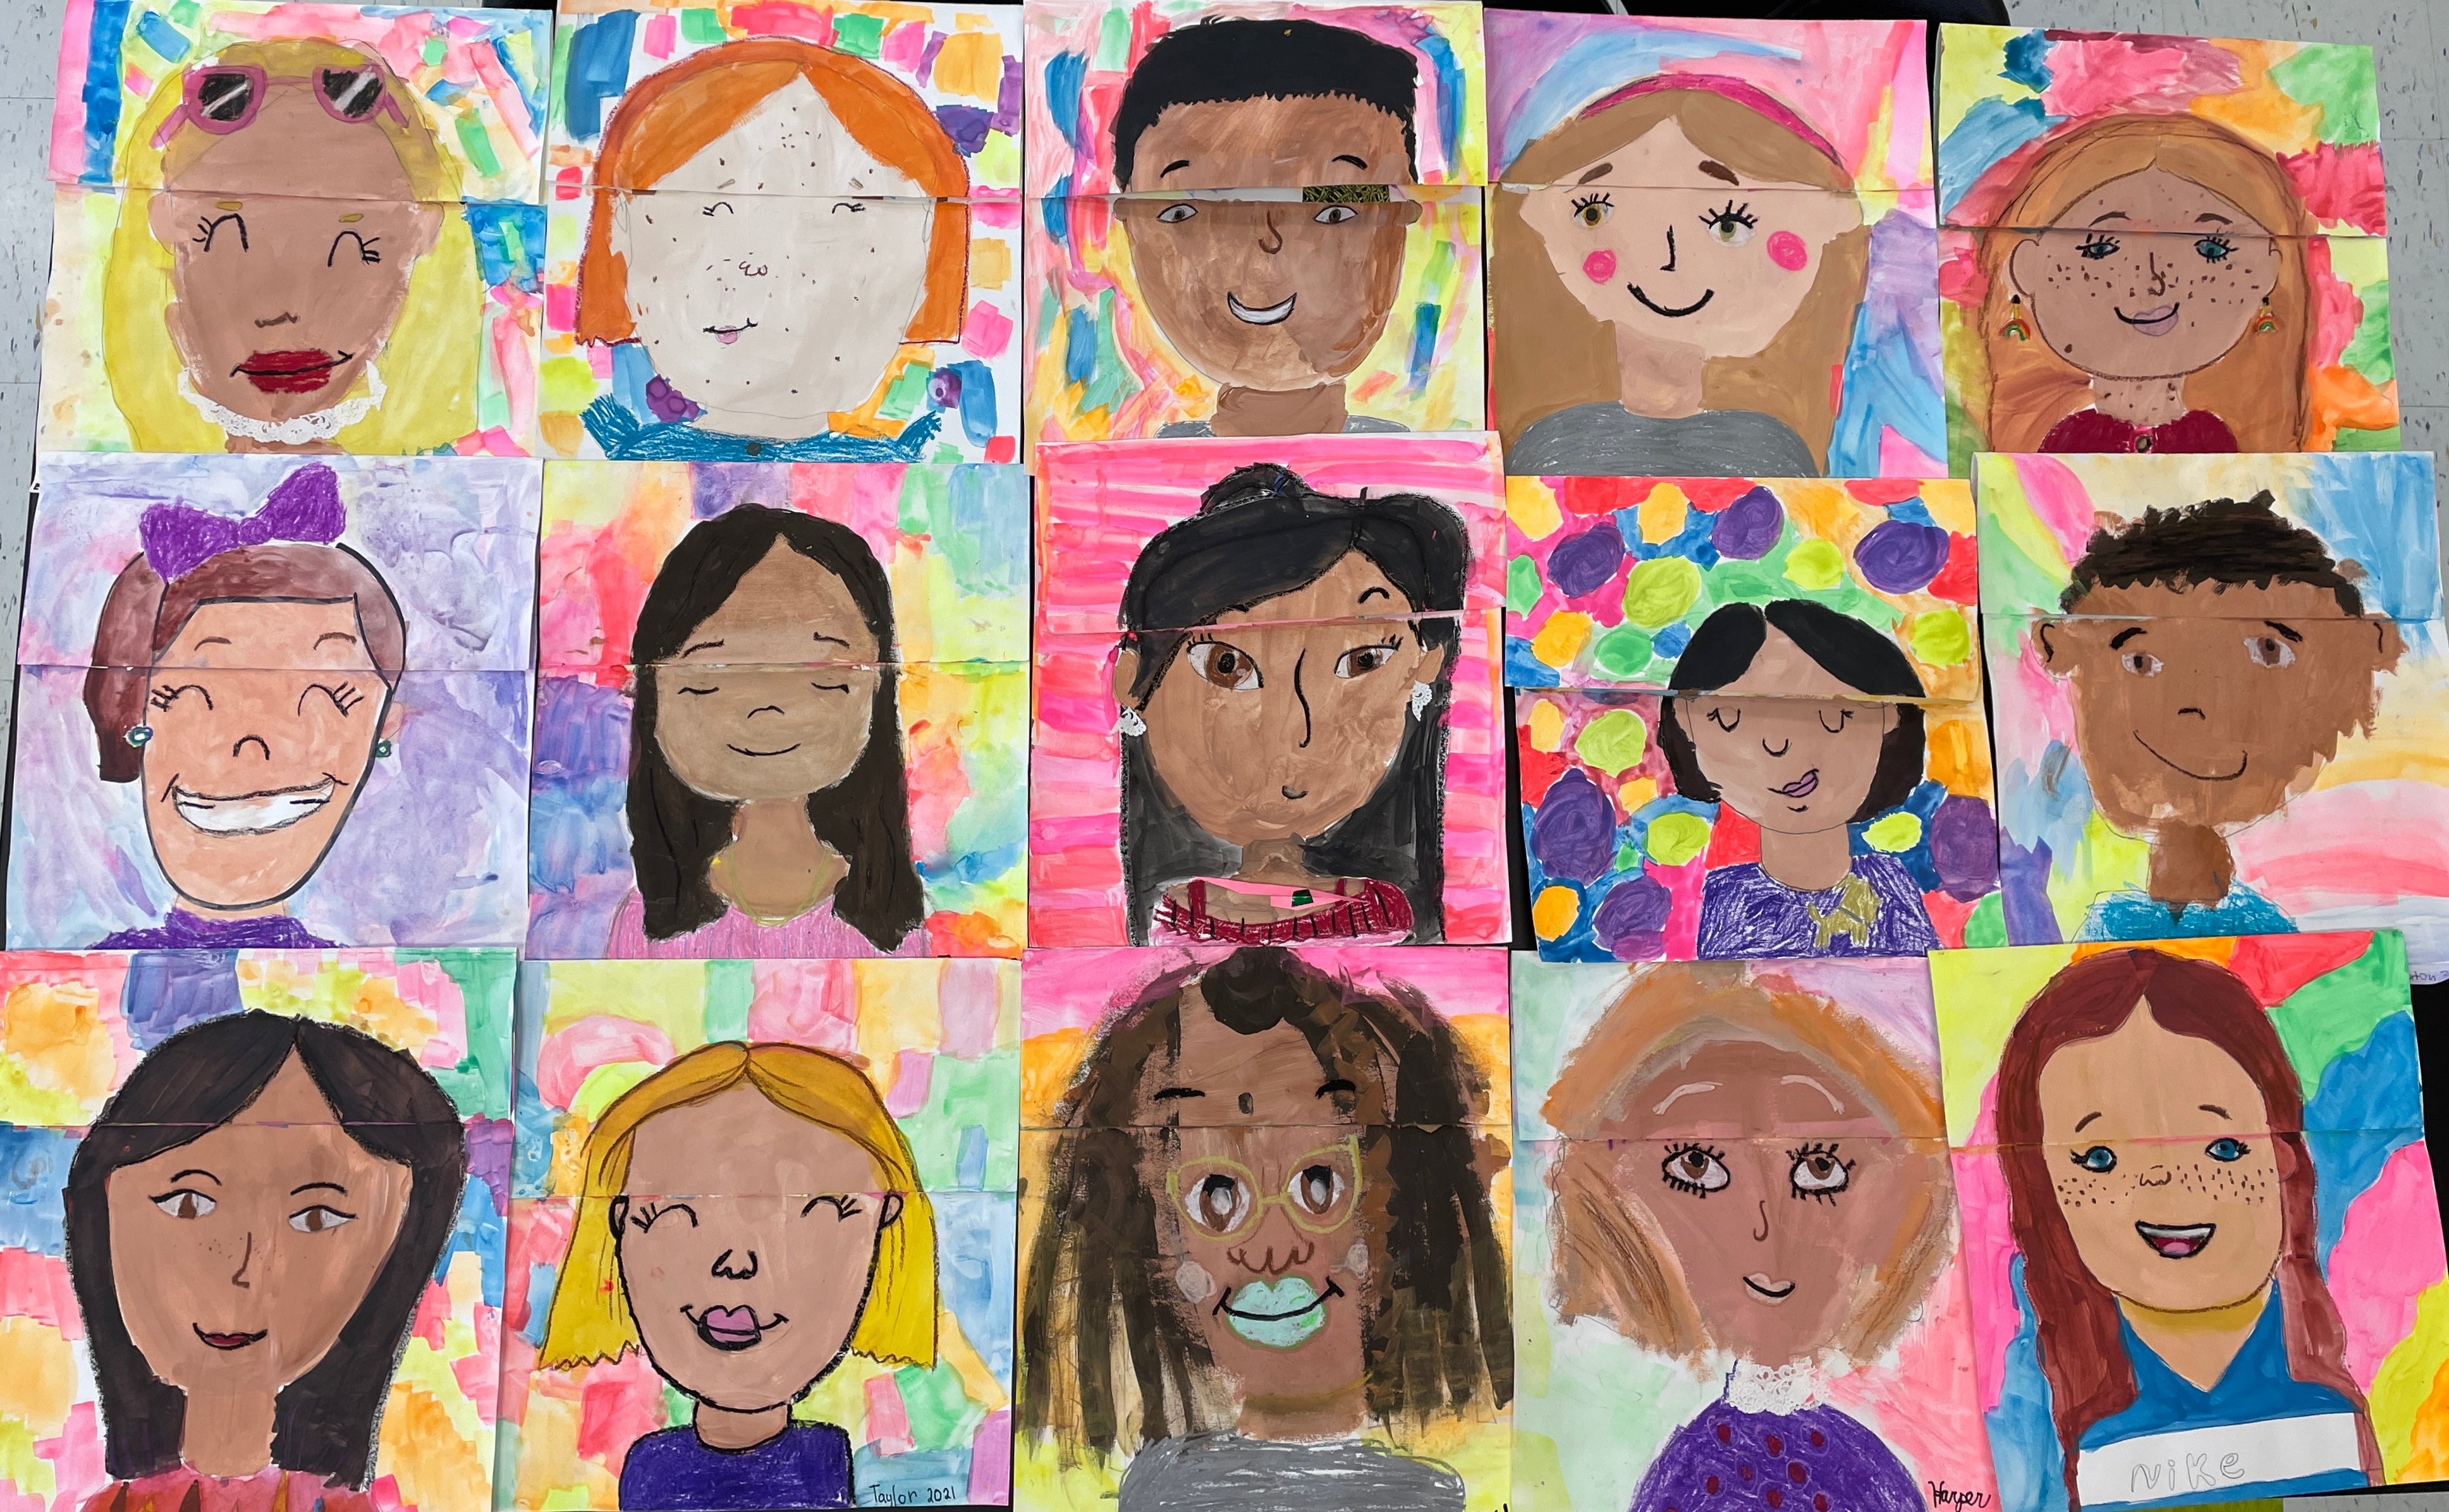
My Favorite Self Portrait Art Lesson for Kids: The Real Me Art Project
In 2008, I developed a self-portrait art lesson to help students express both their inner and outer selves, combining drawing, collage, and typography. I recently updated the project to include techniques like mixing skin tones, understanding facial proportions, and depicting diverse hair textures. This refreshed lesson not only enhances students' artistic skills but also encourages self-expression and identity exploration; find the full lesson plan on my website or TpT store.
Learn more
Folk Art Portraits: Celebrate Influential and Inspiring People
One of my favorite lessons that I do every year with my students is a Folk Art Lesson inspired by the artist Heather Galler. If you are unfamiliar with Heather's work, she has a very distinct style of bold black outlines, bright colors, and lots of lines, shapes and patterns. Her work has been an inspiration for many art projects I've done over the years with my students, but for his one I wanted to focus on her portraits. I love creating this lesson in during the months of February and March, because it gives my students the perfect opportunity to focus on the achievements of Famous African Americans for Black History Month as well as the accomplishments of influential women during Women's History Month in March. In previous years, I have also had students create portraits of people in their community (for our Mr. Roger's art show) and also of teachers and staff members. It's just such a fun lesson that can be adapted in many different ways. I usually do this lesson with 3rd grade and up. To start the lesson off, we have a big talk about inspiring people who have influenced us in some way, and why. Often times, I have my students research and write about this person in their sketchbooks so that they can gather their thoughts which will help when it comes time to create their portrait . Once they have done some reflecting, then I have my students pull up a photo of the person on their iPads and make sure they save it to reference. The next thing I do is I give each students a white board and dry erase marker to practice their portrait using my reference sheets from my full lesson. (*TIP* a few years ago I went to Lowes and got a large sheet of dry erase board and had them cut it down into 8 x 10 rectangles for my classroom. It has been SO amazing to have a class set of white boards available at all times!) The reason I have my students practice on a white board instead of sketching their whole portrait in pencil is because we will be using a bingo dauber with ink (Cassie Stephen's hack) to draw the portraits- and because the tip on that is rather large, I do no want to set my students up for failure by drawing all these small details that can't be achieved with the bingo dauber. Ok back to the lesson: During my demonstration, I show my students how to focus on drawing simplified lines and shapes to represent the physical characteristics of the person they are drawing. I teach them to focus on using the correct type of line to show the appropriate texture, and focus on the features of the person's face that make them unique. Here are a few of my examples drawing Justice Ruth Bader Ginsberg, Amanda Gorman, and Bisa Butler. Once students have drawn a rough draft of their influential person on their board, I instruct them to take a photo of their work with their ipads. I teach them to level their iPad directly above their art, take their photo and them show them how to crop it. This step is important because the chances of my kiddos being able to draw their draft and then draw their final project in the same class is slim. This way they have documentation of their rough draft on their white board before they have to erase it at the end of class. From there, students work to recreate their portrait on large 12 x 18 paper. For the FULL Folk Art Portrait Lesson, you can head to my website, or my Teachers Pay Teachers store. In the lesson you will have access to all of the drawing guides/ idea sheets that students can use to assist their drawings, as well as several different ways to finish these portraits off. I hope your students enjoy this lesson as much as mine do! If you create this lesson with your kiddos, be sure to tag me on Instagram (@artwithmrs.e) so that I can see and re-share their amazing work! Have fun!
Learn more
5 Cardboard Creations Your Kids Will Love
5 fun and engaging cardboard project ideas that will have kids of all ages excited to create!
Learn more
Cardboard Alligators
Are you a sucker for a recycled art project like me? If so well then you’re in the right place! I am so excited to share with yall these adorable cardboard alligators my 1st grade students just completed! Let’s chat about how we made them, shall we? Secure your Cardboard Ok so truth be told, I didn’t go seeking out this alligator project- the materials actually came to me! One of my coworkers mentioned that the IT department had tons and tons of these cardboard dividers that came in the iPad delivery boxes and had asked if anyone was interested. Once we saw the shape of the cardboard inserts, my teammate, Katy and I’s brains started spinning! Once one of us mentioned that the shape kind of resembled an alligator that was it- we had to make alligators! They were too perfect. If you don’t have this exact shape I’m sure cardboard egg cartons would be an easy swap! Make it stand out Check out our attempt to transport all of these pieces of cardboard through the parking lot to our cars without a spill! Lots of laughs were had in this silly scene! 2. Mix your Green Definitely one of the best parts of this project was allowing my students to mix blue and yellow to make their own specific shade of green. To make the paint nice and opaque I added a bit of white to the yellow and blue paint before passing it out so that they would stand out nicely against the brown cardboard. I always instruct students to start with the lighter color first (yellow) and then slowly add the blue in until the preferred shade of green is achieved. I absolutely loved seeing the variety in their greens at the end of this painting day. 3. Bubble Wrap Printing!!! Every kids’ favorite thing to do! And what’s not to love? On this day of the project we spent a lot of time talking about texture, comparing the texture of alligators vs. crocodiles. We knew we definitely needed texture on our gators and bubble wrap seemed like just the ticket! I gave each student a 5x5 ish square piece of bubble wrap, as well as a piece of dark green construction paper to print on. Students used Crayola yellow fluorescent paint cut with a bit of white to paint the bubble wrap and then print on their green paper. Once their green paper was filled, students printed the “body” of the gator on the cardboard which was essentially just the top of the sculpture. We allowed all piece of cardboard and paper to dry. 4. Tail and Snout Now it’s time to take that extra green piece of paper and create your details for your alligator. You will definitely be cutting the snout and tail out from this paper, but depending on how much space is left- maybe not the legs. It’s up to your students! Cut the printed green paper in half vertically, one side will be for the tail and the other for the mouth. I rarely ever use tracers so instead, I have my students measure a 4 finger width for how wide their tail should be at the base. Then on the opposite end of the long piece of paper, they find the middle with a dot, then connect the lines to make a large, long triangle. One your second green paper strip, fold it in half like a book- this will be the open snout of the gator. Again, have students measure the width of 4 fingers on the folded side of the paper, draw a large long rainbow or V shape (for a crocodile) and cut it out so that you have a mouth that opens and closes. Use red paper to cut out a “U” that is smaller than the mouth and glue it inside, then use white colored pencils or crayon to draw all those alligator teeth! For added details, use green scraps to draw and cut out two small “U” shapes for nostrils. Draw them as wide as the tip of your finger and then fold the flat part over just a bit to create a flap. Using a sharpie, draw another (slightly smaller) “U” on the shape and color in. 5. Legs, Eyes and Spikes, oh my! Legs: Using either scrap pieces of green bubble printed paper or just plain green construction paper, have students fold a small piece of paper in half (hot dog style) and draw a leg. I have the students make sure their leg is at least 2 fingers wide with a zig-zag line for toes. Cut out the leg, which will double into two because the paper was folded. Take another piece of green paper, trace the leg you just made as a template and cut out two more legs. Glue legs to sides of alligator, but be sure to have students hold for at least “20 alligator seconds” for some grab time. Eyes: Ok, so on my original example, I used a ping pong ball that I had cut in half with an X-acto knife… and quickly realized how unrealistic it would be for me to find the time to cut all these ping pong eye balls for 200 first graders. So, enter- model magic! SUCH a better solution! If you have never used model magic before, it is SO much fun- and the best part about it is that it is there is NO MESS! Hooray!! Give each student a small packet of white model magic and have student split the packet in half. Reserve half of the pack for spikes ( we will do those in a moment). Split the original amount in half again and roll each piece into a ball. Model magic is amazing and will stick to surfaces while it’s malleable, so place each of the spheres on the cardboard for the eyes. Once the model magic has hardened the following week, you can take a sharpie and draw the gators’ pupils. Spikes: Using the remainder of the model magic, flatten it out to make a slab. Then, take a yellow washable marker and color right onto the model magic, covering as much of the surface as possible. Then take a blue marker, and make blue dots all over the yellow. Pick up model magic and begin to work the materials in your hands so that you see the yellow and blue starting to swirl together to make… you guessed it… GREEN!!! If the green is pretty light, feel free to repeat this process over and over to mix the shade of green your students would like. Once the green is mixed, pinch off small amounts of model magic and form into small triangles. Add a dot of Elmer’s glue underneath and then place them in a row along the spine of the gator. Repeat to make as many spikes as desired Bonus Step: If you have it, have students add a bit of blue cellophane down around the base of the alligators for added shine and fun! I had students first cut a piece of cellophane into two long strips, add a line of glue into the base of the cardboard and then tuck the cellophane in on each side, wrapping it around. Honestly this has been one of the kids’ favorite projects and I couldn’t agree more! So many fun processes all wrapped up into one! If you give some variation of it a whirl, be sure to tag me on Instagram so I can see! Have fun!
Learn more
Home For the Holidays Art Lesson
My students have been on a BIG winter homes kick per our last Winter Village lesson. So I decided to encourage them to take their imaginations a step further and give them the opportunity to create the interior of a winter home all decorated for the holidays. Now, in full disclosure, I actually came up with this lesson as a sub-plan because of some unexpected child care issues that popped up for us (eh hem- gotta love those 10 day exposure quarantines). ANYWAY- I created this lesson while I was prepping to be out, and the students did such an amazing job that I decided to keep going on when I returned to school! The lesson is super easy and incredibly engaging for students of all ages! Let me share with you how we made these adorable, cozy and interactive homes! Before starting the actual project, I recommend reading a book talking about different and diverse family traditions. I love this blog by Brightly sharing tons of different book recommendations. I also would recommend the book Windows by Julia Denos or Home by Carson Ellis. Ask your students about what holidays they celebrate in their home and what kind of traditions they have surrounding those holidays. Materials: Construction paper (11 x 17 if you’d like a bigger house or 9 x 12 for a smaller version). I used Astrobrite paper for my example shown, but my students used Tru Ray construction paper A pencil and washable markers to draw with. (Washable is important here because you do not want your marker to bleed through the paper). I used Posca paint pens to draw my example while home Construction paper crayons or high quality colored pencils (Prismacolor shows up amazing on darker paper) Winter Village Drawing Guide and Interior Spaces Reference sheet. Both are available on my website or TPT store. Step 1: paper in half horizontally. This helps to find the middle of the paper. Then fold each side into the centerline. Step 2: Cut off the corners of the folds for the roof. Step 3: Draw the outside of the house using a washable black marker. For ideas and inspiration, provide students with Winter Village Drawing Guide. Step 4: Open “doors” of the house and begin drawing the inside of the house! Students can choose to draw the inside of their home as one large room or they can divide it up into multiple rooms. Students can draw elements of their real home or create a new space of their own… their DREAM house! If this lesson is being done around the holidays encourage students to add a bit of their holiday celebrations and traditions to their homes as well. This was one of my examples in which I left for my students. This example showed what a house could look like if you chose to divide it up until many rooms. Step 5: Color in construction paper crayons or Prismacolor pencils. Higher quality colored pencils like Prismacolor show up incredibly opaque and bright on construction paper- but they are a bit pricey. So I highly recommend construction paper crayons as a cheaper alternative! This lesson is so fun and easy and the perfect project to get us through the last few days til winter break! I hope you and your students enjoy! Have fun! Happy Creating!
Learn more
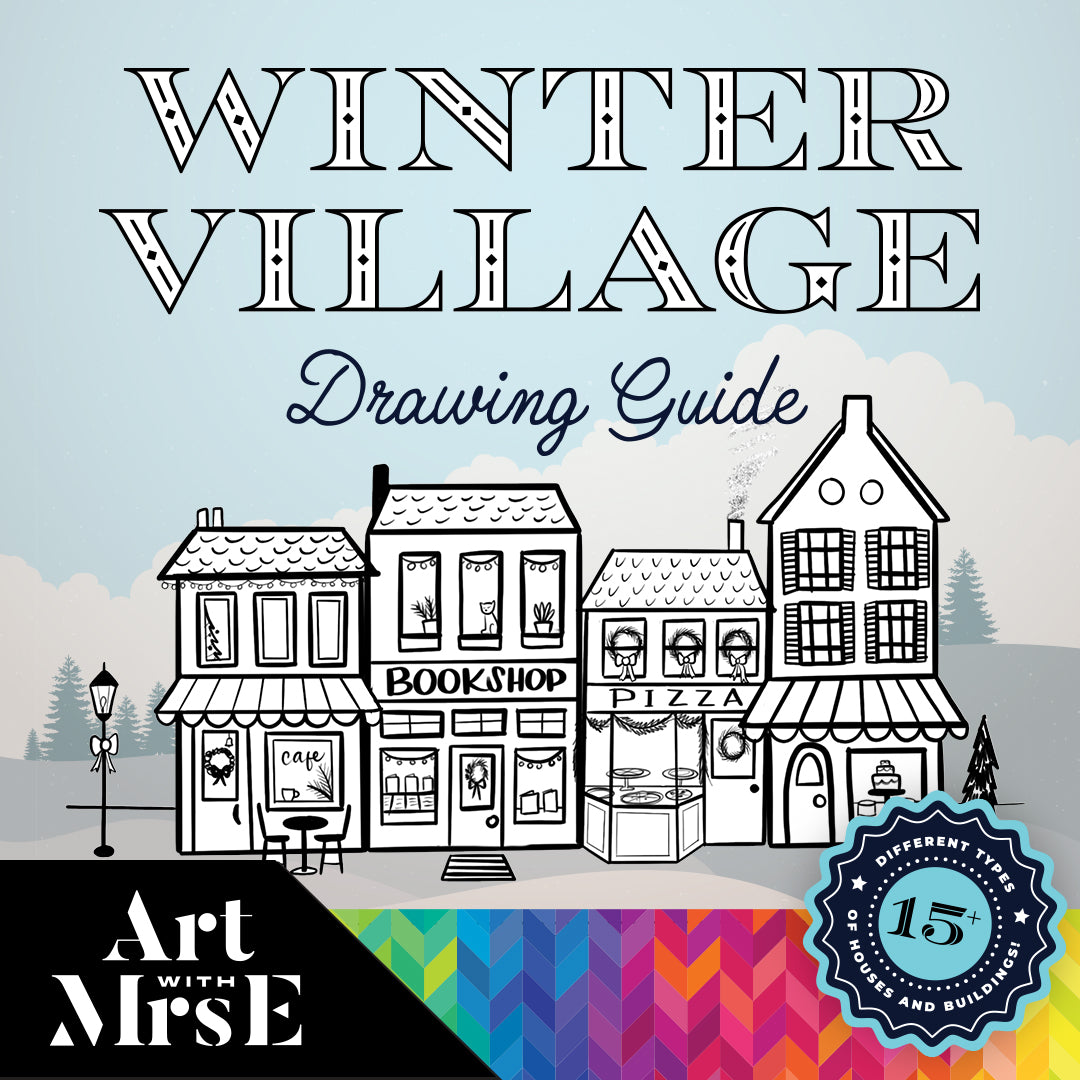
Charming Winter Village Drawings
Looking for an engaging winter art project that your students will truly love? This Winter Village drawing lesson is a cozy, low-prep art project perfect for elementary art classrooms, combining storytelling, drawing skills, and creative choice. Inspired by children’s literature and designed to build confidence, this winter art lesson helps students move beyond simple house drawings to create charming, detailed villages full of personality and imagination.
Learn more
Botanical Plexiglass Painting
Is there anything more satisfying than painting on glass or plastic? I think not! That’s why plexiglass is the perfect surface to keep your students engaged while painting. A few days before my adapted class while chatting with my librarian pals, I noticed an extra standing piece of plexiglass in their storage room that was currently not in use. My brain instantly started spinning thinking of potential ideas of how I could use it in the art room. My students paint and print on small pieces of individually cut plexiglass all the time, so I’m no stranger to how wonderful plexiglass is- but I was so excited to have a large piece that was vertical! Thankfully my fabulous coworkers said I was happy to borrow the plexiglass for class so that’s what I did! Photo of Lucy Tiffney working (Source https://www.sofa.com/inspiration-corner/design-lab-lucy-tiffney/ ) When trying to figure out what it is we were going to paint on the plexiglass, I suddenly remembered artist and designer Lucy Tiffney who I had started following randomly on Instagram a few years back. Lucy is an artist, muralist, and designer with a distinct painterly style of vibrant botanicals and her work is just gorgeous! With our theme this year being the rainforest, I thought that Lucy’s work would be the perfect reference for this project in adapted art. So here’s how we did it! Materials: Plexiglass soft bristle paint brushes (I love Royal Langnickle brushes of all sizes) Tempera paint (if you plan on washing it off) I use Crayola Premier Tempera paint- the fluorescent colors are my favorite! Messy Mats & Smocks Reference images of Lucy’s work and plants 1. Prepare Your Materials and Work Space Prep your paint. Lucy obviously uses many different types of greens and blues, but she also uses different pinks for a pop in her work. So I prepared lidded ice cube trays with colors from Lucy’s palette mixed with a bit of white to make the paint nice and opaque on the glass. Prep the space I prepared the tables by covering them in my large messy mats with the plexiglass in the middle and Lucy’s work on my board as reference 2. Get Them Started Before my students arrived, I painted a few of the leaves/ botanicals around the edges to show them ahead of time what will be going on the surface. This is also a fun way to invite them into the lesson- when they came in and saw this interesting glass on the table with paint on it, they were ready to jump right in! 3. Demo How to Paint the Leaves then Let Them Do Their Thing! On a piece of scrap paper nearby I showed my students how to paint one long line for the stem and then add short lines on each side for the leaves. Some students really grasped the demo and others decided to paint whatever they wanted- and both were completely fine! As long as your students are safe, engaged, and hopefully having fun then that’s a win in my eyes! If the artwork happens to turn out lovely at the end then that’s a bonus! For my teaching adapted art is so much more about the experience for my students than the final product. Students sat on each side of the plexiglass which was really fun for them to see their peers across from them also painting the same surface! 4. Display Your Art! The best part about our plexiglass botanicals was showcasing how beautiful they turned out! Our wonderful librarian suggested we display our work in the windows of the library since we have large bright windows. It turned out to be the perfect space for our display and is enjoyed by every student in the school! Be sure to give plexiglass (or even window painting) a try! Your students are sure to love it!
Learn more
How to Make Painted Paper
First of all, if you’re not following the fabulous Laura Lohman over at Painted Paper Art (@paintedpaperart) then stop what you are doing and follow her on all social media outlets. Laura is a fabulous veteran teacher who so many lessons, resources and much more available on her blog. Through the magic of Instagram, one of the thing I learned from Laura was how to make painted paper. I never thought I was one much for collage but creating beautiful unique painted papers has become a game changer and my students just adore them! You can check out Laura’s blog post here about how she orchestrates her painted paper set up and organization. Laura has taught me a ton about painted paper but I thought I would go ahead and share with you how I go about making them with my students. PAPERIn years past I have made painted paper with 80 lb drawing paper but this year I decided to try it out with cheap newsprint (to save my good paper for drawing projects). After watching a video about Eric Carle making his papers on tissue paper I decided to give thinner paper a whirl- And guess what! The newsprint was awesome! I just had to remind my students that the paper was thin so they couldn’t “over paint” or “over scrape” in one area of the paper or it might rip through. PAINT I only use Crayola Premier tempera. Fluorescent paint too (it’s a must for me!) I tell my students that as a class we are going to all work together to make a huge assortment of painted paper to all share. Using lidded ice cube trays (thanks @kelsiquicksall for that genius hack!) I supply each table with two analogous colors (colors that are next to each other on the color wheel) plus a little white. The reason for only analogous colors is that no matter how much of little they colors are mixed they will still look lovely no matter what! When you add too many color options you can go ahead and assume the kids will mix them all and leave them with brown or gray painted paper. After providing paint, i encourage students to add any lighter paints first and then layer darker colors. That way when they go to add texture the dark paint scraps away revealing a beautiful bright texture underneath. TOOLS I provide each table with a variety of texture tools. Textured scrapers, texture rollers, plastic forks & knives, bottle caps, sponges, toothbrushes, old hotel swipe cards, you name it! The key is reminding them paint about a quarter / half of their paper at a time and then adding texture while the paint is still wet! If they paint the whole paper, chances are by the time they go back to add texture not much will happen or they will rip the paper Bc the paint is no longer wet & smooth. Allow the paper to dry then (if needed) press with large books to flatten (my go-to are those old art history books from college that I no longer need!) Have fun making lots of painted paper and don’t forget to head to the queen of painted paper’s blog, Mrs. Laura Lohman aka Painted Paper Art.
Learn more
Sugar Skulls (Part 2): Fluorescent Paint
Hi friends! Today I wanted to share with you part two of my giant Symmetrical Sugar Skulls lesson that I did with my adapted art class. This lesson was so fun and would be well loved by students of all ages and abilities! If you are looking for part one of this lesson, you can follow this link to learn how to make the big ole sugar skulls. For this lesson you need: MATERIALS for Part 1: Oversized white paper (I used 18 x 24 posterboard) Black tempera paint Large paint brushes Part 2: Fluorescent tempera paint (I love Crayola Fluorescent paint) Paint brushes, Cut up sponges in clothes pins, Q tips, or any other stamping materials you have around the house! Optional (but recommended) Black lights for glowing fun! I use these HouLight black light flood lights. Sugar Skull Idea Sheet Step 1: Gather your Supplies For this project you will need fluorescent tempera paint if you would like your paint to glow for your students. I use Crayola Premier Fluorescent Tempera paint. I also gathered various painting/stamping tools for my students to use such as: Q tips, Sponges cut into pieces and held by clothes pins and large round paint brushes. Step 2: Set the Scene! To add a bit of extra excitement to this project I went ahead and blacked out my classroom before my students arrived. I pulled down the blinds and plugged in 3 Black Light Flood lights that I had previously purchased for art shows. There are tons of options regarding black lights on Amazon but I found that flood lights really project and fill a space! I ended up buying a brand called Houlight. I placed my black lights as high up and tilted downward as I could. The paint was poured and the scene was set and I was so excited for my students to arrive! Step 3: Let them paint and have fun! I showed my students that they could do the same “paint then fold” transferring technique that we did the previous week but I found that so many of my adapted art students truly just wanted the freedom to paint their skulls however they wanted. Like the previous class I had my Sugar Skull idea sheets available and they enjoyed dotting around the eyes, and using sponges to paint florals in the eyes. However, some of them just really wanted to paint their skulls however they wanted and that was completely fine with me! The important thing is that they were engaged in the project and having fun! There is something so (dare I say) satisfying about painting in a black light setting. The paint glowed as the students painted and they were quiet and focused the whole class period! I plan on hanging these sugar skulls in a showcase in the school and hopefully shining a black light on them to glow so that other students can be amazed! This was such a fun project and I know that students of all ages and abilities would love it!
Learn more
Oversized Symmetrical Sugar Skulls (Part 1)
Let's learn about the Mexican holiday, Dia de los Muertos by creating an oversized symmetrical sugar skull in art class! This lesson is hands on, fun and has the perfect books to accompany it!
Learn more
Interactive Haunted House Art Lesson
Allow me to introduce you to one of my students’ favorite halloween/ fall themed lessons! This interactive haunted house project has been one of my tride and true lessons over the last 15 years as an art teacher, and my students never cease to amaze me with their creativity! First, to create this haunted house (or fall house for any students who do not celebrate Halloween), students will need my Haunted House Drawing Guide that can be found in my Teachers Pay Teachers store. This drawing guide easily breaks down how students can use line and shapes to create an old creaky and run-down haunted house. Students are able to follow along with this guide both in person or it’s perfect for remote learning! There were even several times last year that my Smartboard wasn’t working, so my students pulled up these guides from their ipads and followed along without missing a beat! Once students have finished drawing their haunted house, they are able to add several signature creepy halloween characters to their houses (also provided in the guide)- but don’t add them all YET because the best part is yet to come! After drawing, have your student trace their pencil lines in varying-sized Sharpies (fine for the larger shapes of the house and an ultra-fine Sharpie for the small details and textures around the house. Have students color their haunted houses in materials of their choice (I usually do crayon, construction paper crayons or colored pencils). Once the Haunted Houses are colored in, using a Xacto blade, carefully cut open the window flaps or door to the house leaving one seem open and tape a small piece of paper behind the windows on the back. Have students add more funny/ creepy characters in the windows for added fun. I love giving my students the prompt of “What would be the weirdest/ silliest thing you would never expect to see in a haunted house?” A ghost singing in the shower? Dracula cooking garlic soup? You will be pleasantly shocked and in awe of the creative ideas your students come up with for this project! If you decide to do this lesson with your students be sure to tag me on Instagram so I can see (@artwithmrs.e ). Have fun and Happy Halloween!
Learn more