But First.... What is Dot Day?
International Dot Day is celebrated every year on September 15-ish and is inspired by Peter H. Reynolds’ beloved book The Dot. The story follows Vashti, a student who doesn’t believe she can draw, until her art teacher encourages her to “just make a mark, and see where it takes you.” That one small dot leads Vashti on a journey of courage and creativity. Dot Day has since grown into a worldwide celebration where millions of students and teachers join together to create, collaborate, and make their own marks in meaningful ways!
Ever since participating in my first dot day in 2015, it has become one of my absolute favorite ways to kick off the school year and celebrate creativity! Over the years, I’ve tried so many variations of dot projects, and today I’m sharing 10 exciting lessons you can try for Dot Day that are a mix of my own, and also from teachers I admite! From simple, low-prep ideas to beautiful collaborative school-wide displays. As a reminder- you can also check out the official International Dot Day Website to sign your class up and get tons of ideas and inspiration! But here are just a few of my favorite dot day displays and projects I've done over the years. Are you ready? Let's get started!!
1. Collaborative Rainbow Dot Display

This one took the internet by storm back in 2017 and I just LOVE seeing it recreated every year!! Honestly, when I dreamed this display up I had no idea how popular on Pinterest it would become and still look back on it as my all time favorite dot day project. Students each create their own dot, and together they form a large rainbow mural that brightens up your hallway. I have a full FREE step-by-step tutorial for this one on my blog: Collaborative Rainbow Dot Display.
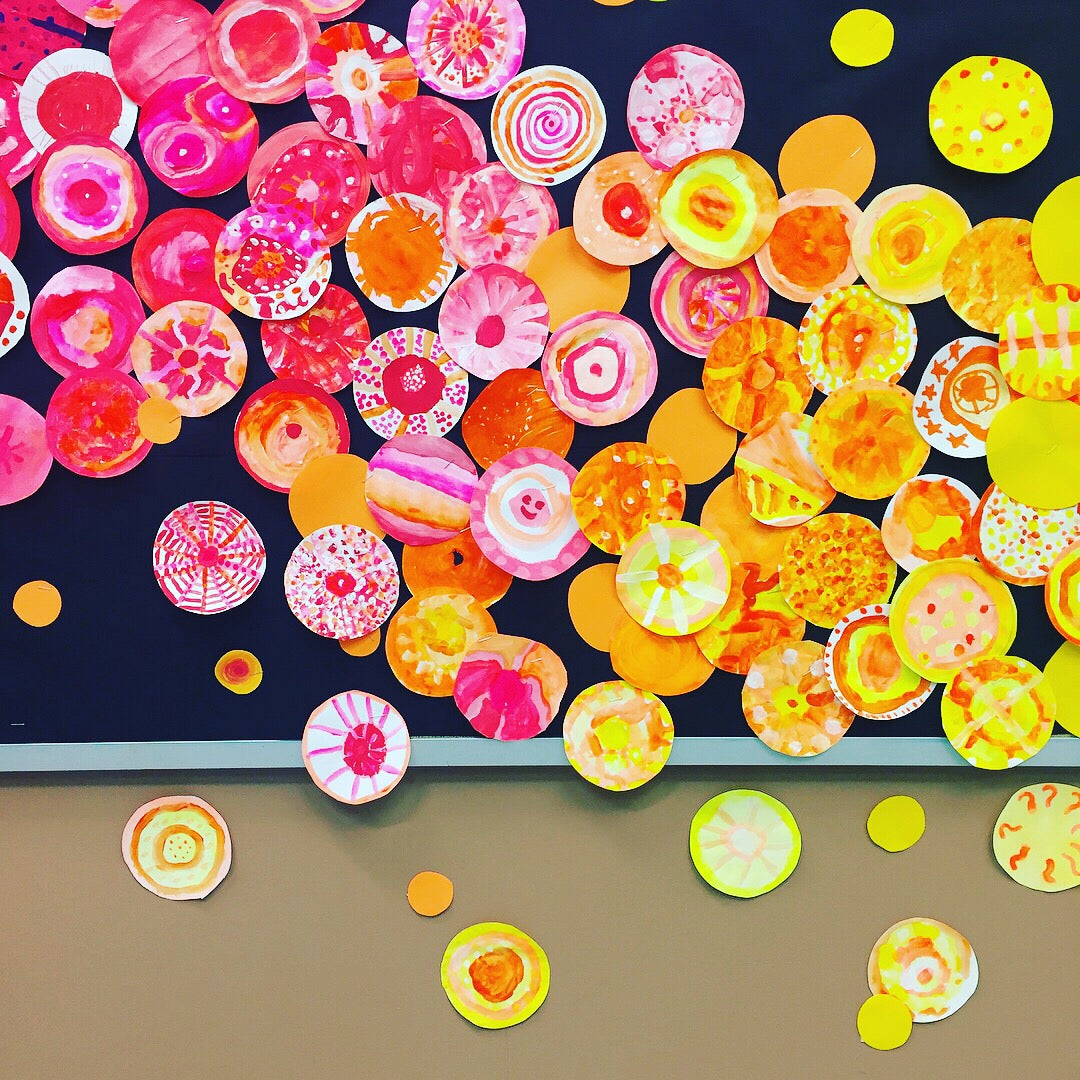
2. Concentric Circle Dots (Paper Plate Painting)

Sometimes the simplest lessons are the most magical. Give each student a circular paper plate and have them start with a dot in the center, painting outward in rings. You can use tempera paint for bold colors or Kwik Stix if you need a less-messy option. Quick, easy, and beautiful!

note: these painted plates above also doubled as the start to our radial weaving project by Cassie Stephens. Check out her blog here!
3. Tints + Shades Circles

This lesson not only makes a gorgeous collaborative display but also introduces color mixing. Each student paints a 4x4 square using just one color plus black and white to create tints and shades. Assign each table a different color, so when you display them together, you’ll have a rainbow that represents every child in the school—because just like a rainbow, a school isn’t complete without every color and every kid.

4. “I Am Human” Collaborative Display

This project, featured on the International Dot Day website, turns students into the dots! This is honestly one of my favorite dot day projects we've done, because it puts the emphasis back on the importance of each child! I have my students each paint a super simple self-portrait (inspired by Peter Reynold's style from his book I Am Human, in neon colors (mixed with white to make it really POP on the balck paper), which come together as a giant rainbow mural with the words “I am Human. One of Billions, but Unique!” You can learn more about how I facilitated this project on my blog here and also our feature on the official Dot Day website : Dot Day Spotlight.

5. Radial Symmetry in Nature


Take Dot Day outside! Students work in pairs to collect natural materials like rocks, leaves, or acorns, and use them to build radial designs that begin from a central dot (helllllllo Andy Goldsworthy connection!) This is a perfect way to connect art with nature, mindfulness, and collaboration.
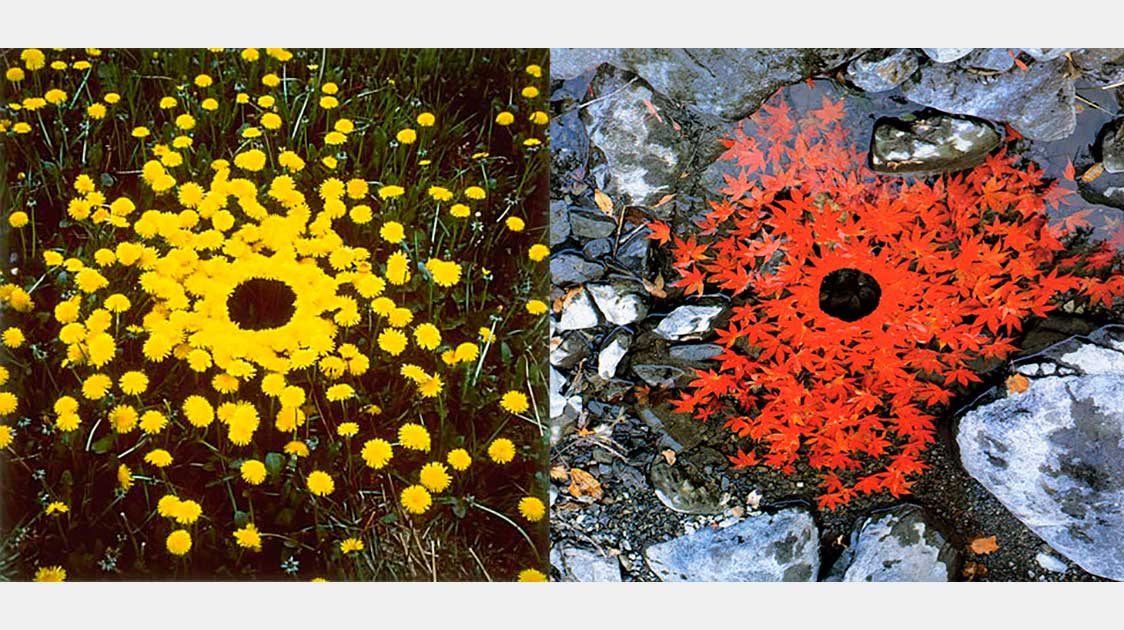
Art featured above is by artist, Andy Goldsworthy
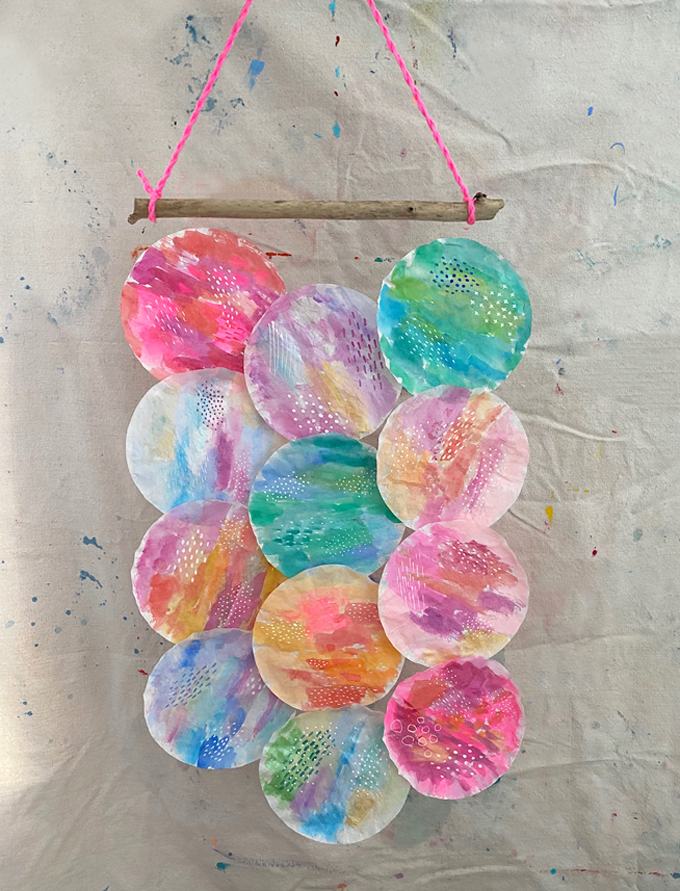
6. Coffee Filter Dots or Wall Hanging


Coffee filters + washable markers = dot magic! After coloring their dots, students spray lightly with water to let the colors bleed and blend. Display them as a rainbow or let each stand alone as a unique work of art. (Tip: use trays or plates to contain the mess as the filters dry.) You can display the dry coffee filters on windows to act as a sun catcher, letting light in or mount them on paper!
But if you are looking to up your display game with coffee filters, be sure to check out this beautiful display by Bar Rucci, Art Bar Blog! I absolutely love the way she had her student paint each dot in a set of warm or cool colors, and then added dots and designs overtop of them once they were dry. Hang anything from a stick and you have instant cuteness! Be sure to check out her full blog about this project here!
7. Cardboard Tube + Bubble Wrap Printing

Gather anything round—cardboard tubes, jar lids, or even bubble wrap—and let students stamp circles onto paper. Layer them up for extra texture! Printing with bubble wrap is especially fun and always gets squeals of delight. These heart above were made during the month of February in my adapted art class, but the process is the same for dot day, just without the heart shaped paper to start!
8. CD Printing (Subtractive Method)


Give new life to old CDs! Have students paint the shiny side, then “draw” into the wet paint with Q-tips to create designs. Press the CD onto paper for a print. Each one turns out so different, and you can even combine them into a mural. You can also find this technique in my Printed Pedals Lesson
9. Pointillism Inspired by Georges Seurat


The magic of pointillism is that it allows young artists to sloooow down and really think about each mark they are making, without the pressure of every dot being in the “perfect” place. All you need are fine tip washable markers to teach this technique! Show students how to “mix” colors with dots (for example, blue and yellow dots placed close together will appear green to the eye). This project is a wonderful reminder that Dot Day doesn’t always have to be about circles—it can also be about reimagining what Peter H. Reynolds said: “Just make a mark, and see where it takes you.”
10. Collage Dot Pile-Up

Inspired by Mrs. Hilary Green's (with project originally from Laura Lohman's book, Mini Masterpieces, this project is full of hands-on fun! Using painted paper, scrap paper, or textured paper, students cut (or punch out) circles in a variety of sizes. They can layer, overlap, and pile them up into dynamic dot collages. Templates or circle punches make the process easier, and the results are always vibrant and full of movement. You can find the full project in Laura’s book for even more inspiration!
Dot Day is the perfect reminder that creativity has no limits. Whether your students are painting, printing, collaging, or slowing down with pointillism, the important thing is that they get to make their mark. I hope you will consider trying some of these ideas as a way to bring your school together for a colorful, community-building celebration your students will remember!